Summary of this post
Q: How to make sure Google Search can find my hexo blog that has been deployed on GitHub Page? A: Submit your hexo blog to Google Search Console by:
- Add
HTML taginto hexo blog’s<head></head> - Provide hexo blog’s
sitemap.xmlto Google
為了讓 Google 可以搜尋到 hexo 部落格,需把HTML tag(HTML 標記、中繼標籤)加到<head></head>,並提交sitemap.xml給Google Search Console。
Enviroment
hexo: 5.3.0NexT: 8.2.1os: Windows_NT 10.0.18363 win32 x64About _config.next.yml
I use Alternate Theme Config to apply the theme modification according to the suggestion from NexT official document.
Add HTML tag
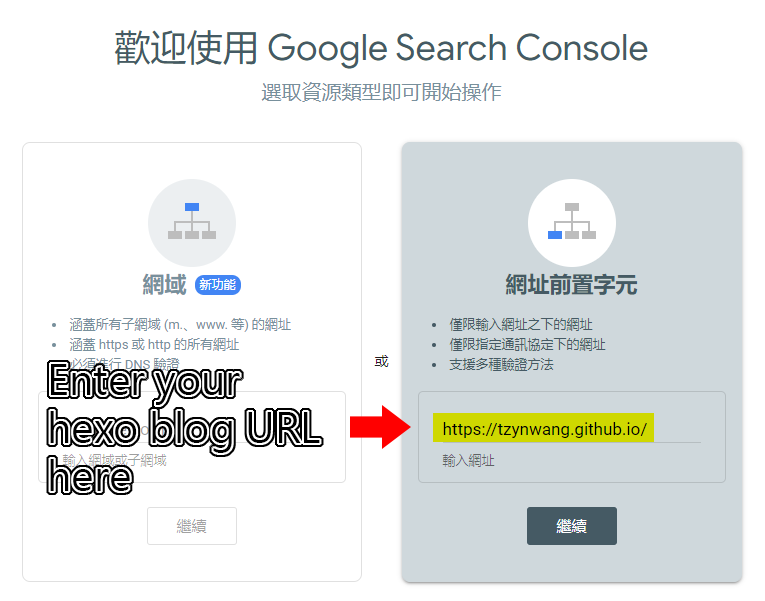
- Visit Google Search Console, enter the URL of hexo blog into right hand side column.
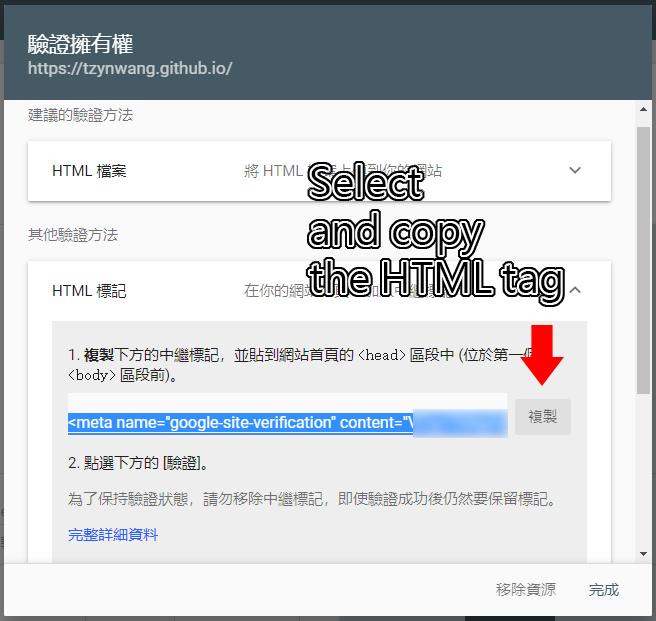
- Select and copy the HTML tag.
- Open the file
_config.next.yml, navigate to the part# SEO Settings, paste the HTML tag “content” part as the value of the keygoogle_site_verificationFor example, this is the whole HTML tag contents you’ve copied:<meta name="google-site-verification" content="(a string includes letters, numbers and _)" />Just paste the content part into_config.next.yml, like the below code block shows:
# ---------------------------------------------------------------# SEO Settings# See: https://theme-next.js.org/docs/theme-settings/seo# ---------------------------------------------------------------
# Google Webmaster tools verification.google_site_verification: (a string includes letters, numbers and _) />- Launch cmd.exe, move to the hexo blog folder, run
hexo clean && hexo generate - Open the file
index.htmlinpublicfolder, the HTML tag should appear between the<head></head>tag - Run
hexo deployto deploy modification to GitHub Page - Back to Google Search Console and click “Verify”

- One of the two parts of Google SEO setting has finished, have a cup of tea ☕
個人目前使用的是 8.2.1 版的 NexT,_config.next.yml已內建支援google_site_verification。
在 Google Search Console 取得 HTML tag 後,將 content 的內容貼上即可。
_config.next.yml若沒有這個參數的話,則手動將整個 HTML tag 貼到\themes\hexo-theme-next\layout\_partials\head資料夾的head檔案中,如下圖:

Provide sitemap.xml
- Launch cmd.exe, move to the hexo blog folder, run
npm install hexo-generator-sitemap --save - Open the
_config.ymlfile in the root of hexo blog, enter the following contents:
sitemap: path: sitemap.xml template: # Custom template path. Leave it as blank if no custom template is used rel: false true tag: true- run
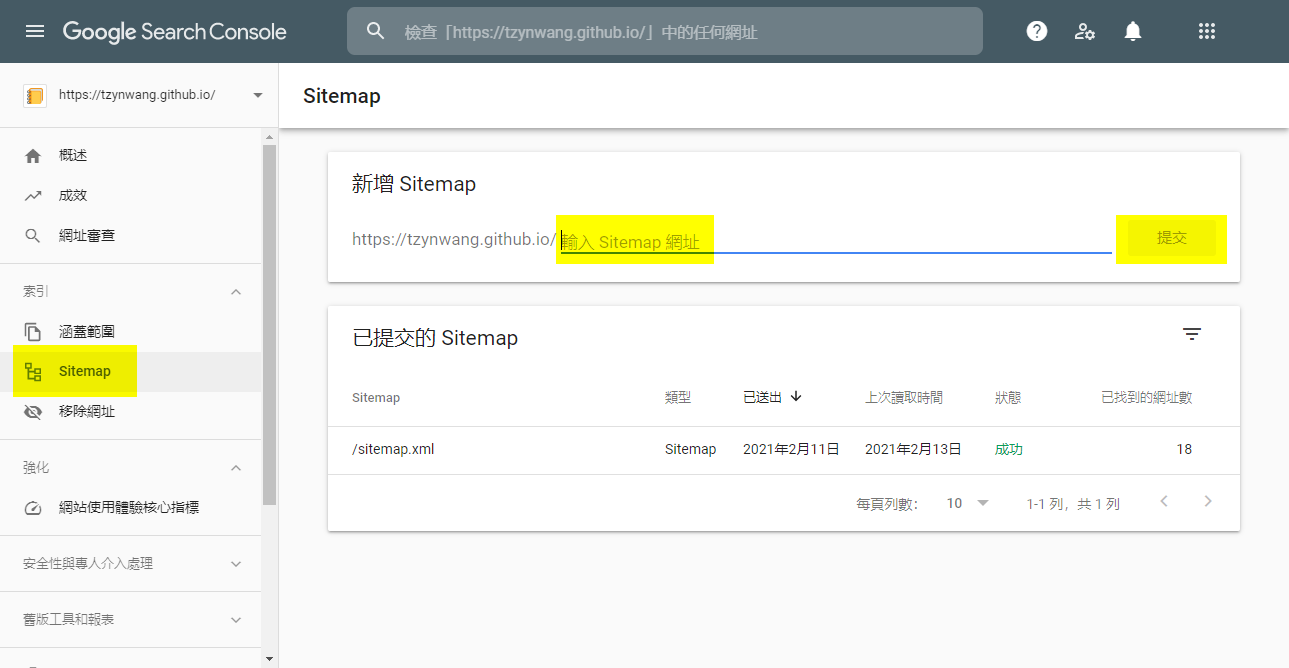
hexo generateto generate the filesitemap.xml - Upload
sitemap.xmlto hexo blog’s GitHub repositorymasterbranch - Visit Google Search Console. Enter “sitemap.xml” and click “Submit”
- Done. The whole Google SEO setting has completed 🎉
Run Mobile-Friendly Test
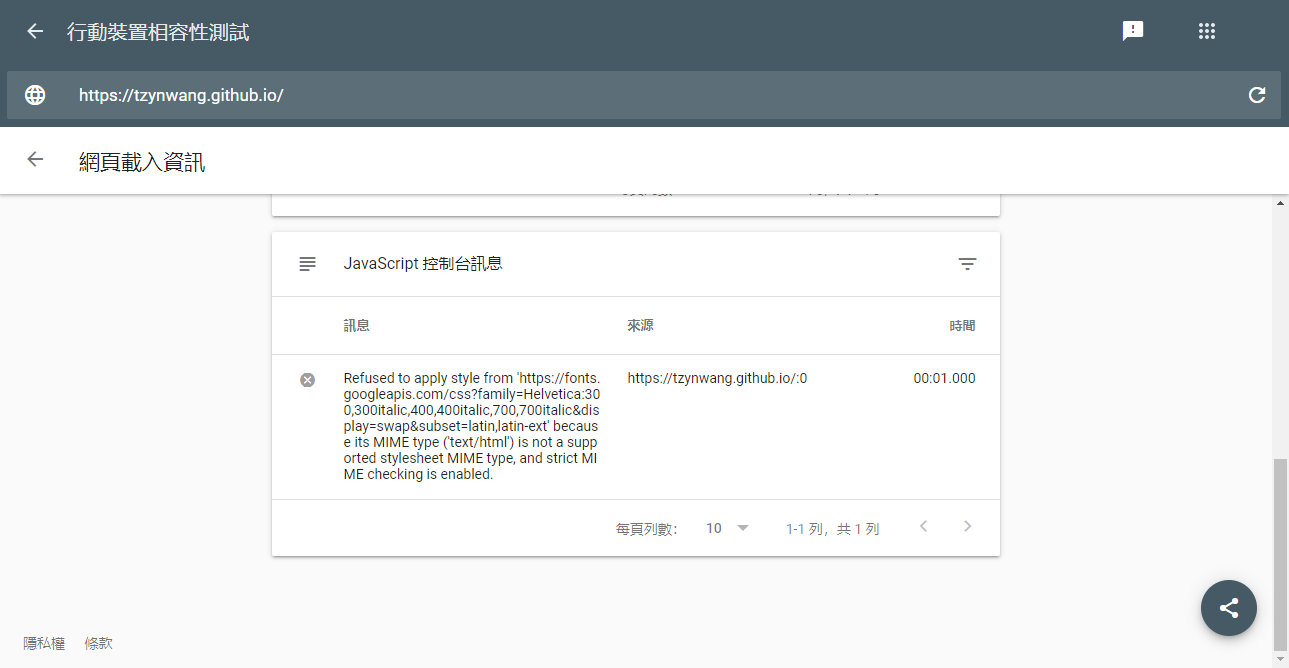
Got an error message when running Google’s Mobile-Friendly Test in the first time:
Refused to apply style from (tl;dr) because its MIME type (‘text/html’) is not a supported stylesheet MIME type, and strict MIME checking is enabled.
Q: How I fixed this problem?
A: Open _config.next.yml and update the host value in # Font Settings part correctly.
font: enable: true
# Uri of fonts host, e.g. https://fonts.googleapis.com (Default). host: https://fonts.googleapis.com/css2?family=Noto+Sans+TC&family=Roboto&display=swap
# Font options: # `external: true` will load this font family from `host` above. # `family: Times New Roman`. Without any quotes. # `size: x.x`. Use `em` as unit. Default: 1 (16px)
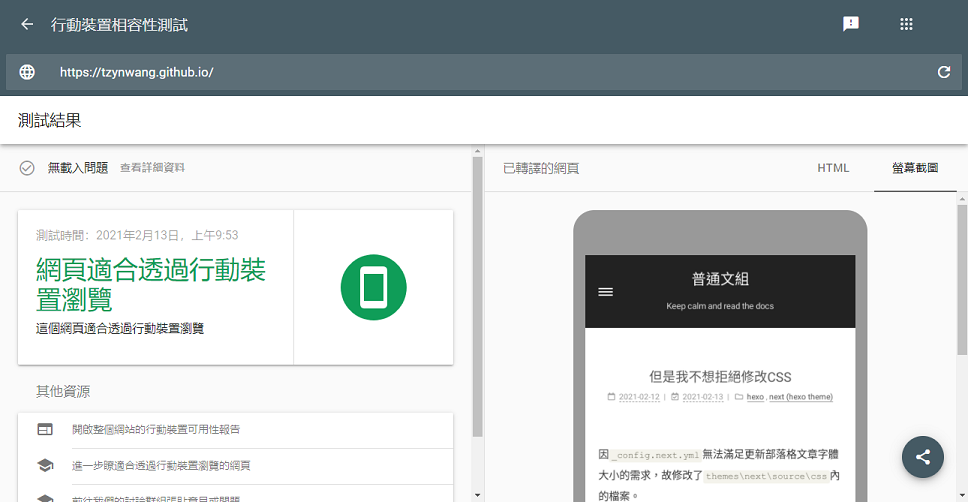
# Global font settings used for all elements inside <body>. global: external: trueRun the test again and get greenlight.
 🎉🎉🎉
🎉🎉🎉
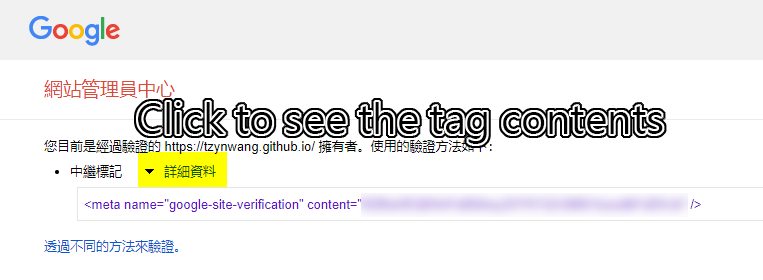
Bonus: I forget the HTML tag contents
- Visit Google Search Console, click “Settings” in the left side menu
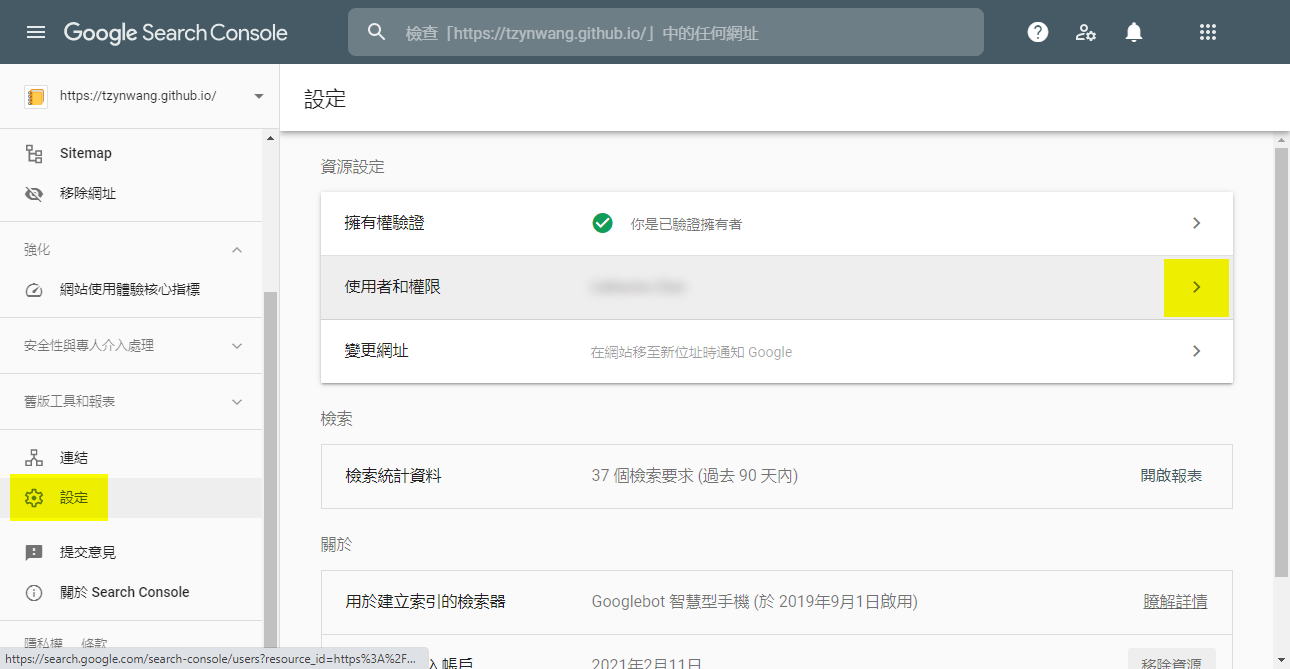
- Click “User”, and then click “User management”
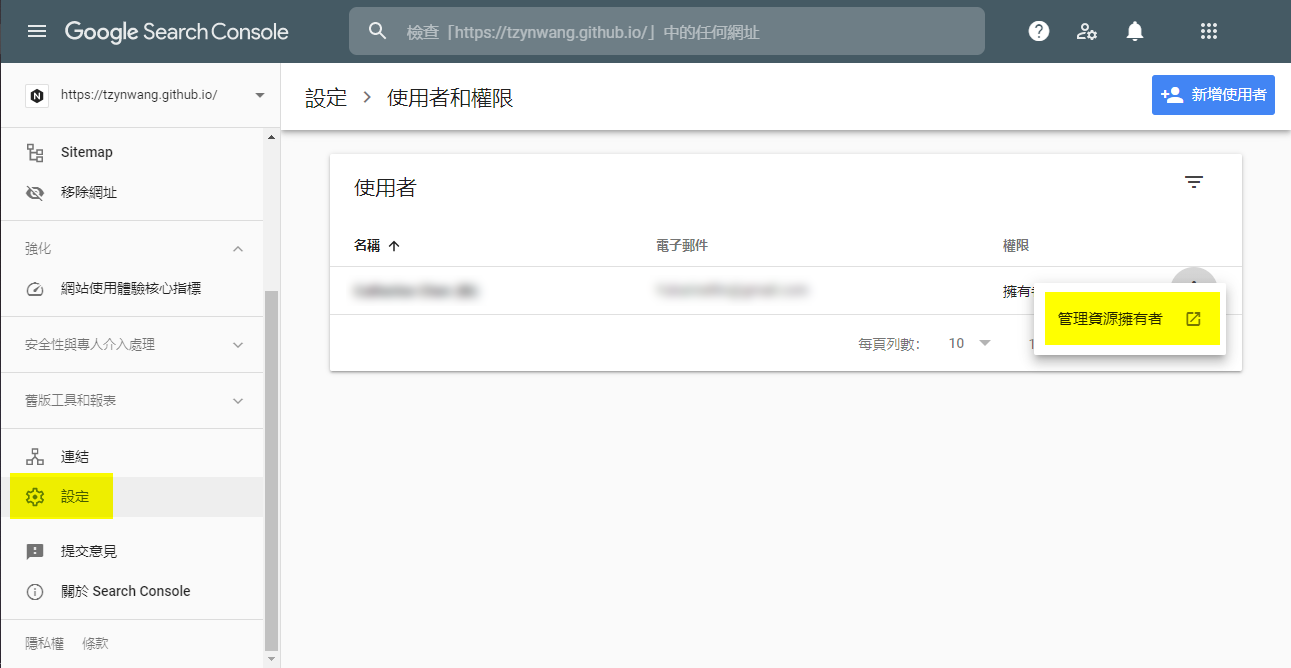
- HTML tag contents are display in the management console