Summary of this post
This post is my notes for the following topics:
- hexo plugin: hexo-tag-figure
- adding additional CSS style settings to NexT theme (by configuring
custom_file_pathin the file_config.next.yml)
此篇主要是記錄hexo-tag-figure的使用心得,以及如何使用_config.next.yml中的custom_file_path參數設定來增加自定義 CSS 設定內容的相關筆記。
Environment
hexo-tag-figure: 0.4.1NexT: 8.2.1hexo: 5.3.0hexo-cli: 4.2.0os: Windows_NT 10.0.18363 win32 x64hexo-tag-figure
GitHub
Example

Code
figure--center: theclass nameof the figure element. This is the required argument, though in the end I didn’t apply customized CSS style to this class, this argument can not be skipped.hexo-tag-figure/book-cover.jpg: the image path. Check the source code to find the path logic: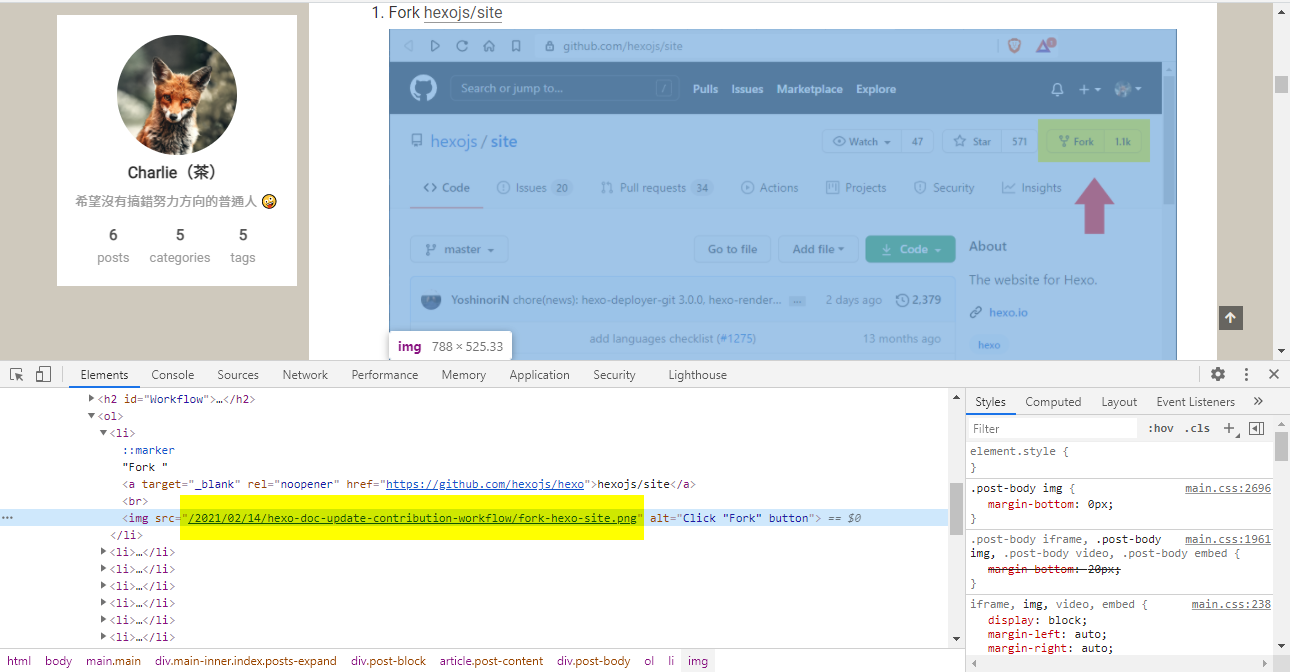 (update on Feb 16 2021: I change the
 permalinksetting from:year/:month/:day/:title/to:title/, thus the image path needs to be updated too. The image path in the screenshot includes:year/:month/:day/:title/since I previously set thepermalinkin this form 😅) Aad the permalink:title/as prefix to load the image. 文件沒有特別針對 image path 做說明,從 DevTools 觀察了一下其他還沒使用 hexo-tag-figure 插入的圖片路徑,測試後發現 image path 要加上 permalink。300: the image width. I skip the height setting.Confessions of a Young Novelist: the title text that is placed infigcaptionelement. Add customized font color and font size to this element.Book cover of Confessions of a Young Novelist: the alt text for this image.
CSS
- According to NexT’s document, extra CSS settings can be added by enable the
custom_file_pathin theme config file (in my case the_config.next.ymlin root folder). This is my configuration:
# Define custom file paths.# Create your custom files in site directory `source/_data` and uncomment needed files below.custom_file_path: #head: source/_data/head.njk #header: source/_data/header.njk #sidebar: source/_data/sidebar.njk #postMeta: source/_data/post-meta.njk #postBodyEnd: source/_data/post-body-end.njk #footer: source/_data/footer.njk #bodyEnd: source/_data/body-end.njk #variable: source/_data/variables.styl #mixin: source/_data/mixins.styl style: source/_data/styles.styl # Enable this option by removing the '#' in the beginning of the line- Add the
styles.stylfile in the pathC:\Projects\hexo_blog\source\_data - Add CSS settings for
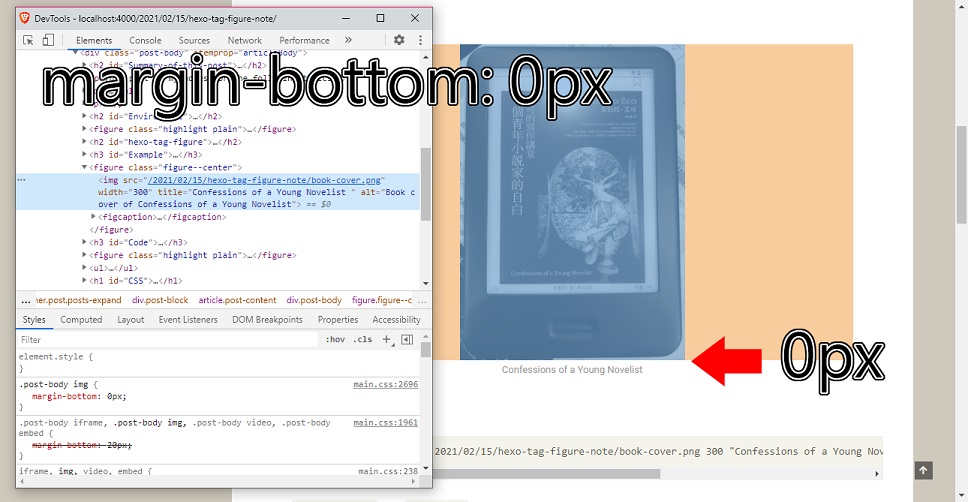
figcaptionelement, remove each image’s bottom margin by setting themargin-buttonto 0px. Withmargin-buttonset as 0px, the text underneath (thefigcaption) will be closer to the image.
figcaption {    color: #999;    text-align: center;    font-size: 14px; # Set to 14px to make the font size same as the text in table of content}
.post-body img {    margin-bottom: 0px;}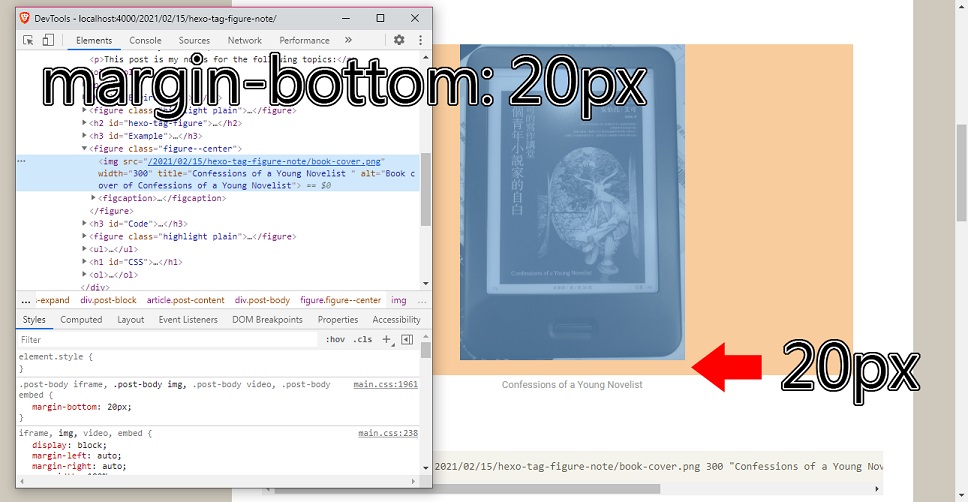
- Save the configuration and run
hexo generateandhexo deploy, done ☕