總結
記錄一些目前有在使用的 VSCode 擴充套件,與自訂 snippets 的步驟筆記。
版本與環境
VSCode: 1.53.2 (user setup)os: Windows_NT 10.0.18363 win32 x64擴充套件(Extensions)
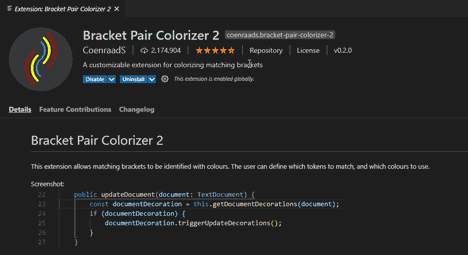
Bracket Pair Colorizer 2
套件網址:https://marketplace.visualstudio.com/items?itemName=CoenraadS.bracket-pair-colorizer-2 幫成對的括號套用相同的顏色,方便辨識。 根據官方 Q&A的內容,2 代改善了執行速度與正確性,其餘設定與 1 代看起來沒什麼差異。
如果要修改套件設定的話,可參考以下 gif:
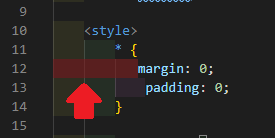
indent-rainbow
套件網址:https://marketplace.visualstudio.com/items?itemName=oderwat.indent-rainbow
幫縮排區域套上顏色,縮排尺寸不正確時顯示為紅色,如下圖。
Lorem Picsum photos snippets
套件網址:https://marketplace.visualstudio.com/items?itemName=huang-an-sheng.lorem-picsum-photos-snippets
練習切版時直接在 html 檔案中輸入picsum即可帶出有假圖的<img>標籤。

- 輸入
picsum後直接按下tab會產生帶一張固定 id 假圖的標籤<img src="https://picsum.photos/id/684/600/400" alt="">- 需要隨機圖片的話,把圖片網址改為
https://picsum.photos/{width}/{height}?random={seed} {width}代表圖片寬度(單位 px),{height}代表圖片高度(單位 px),{seed}為正整數- 假圖網址加上不同的
{seed}會讓每一組網址產生不同的圖片,參考下圖: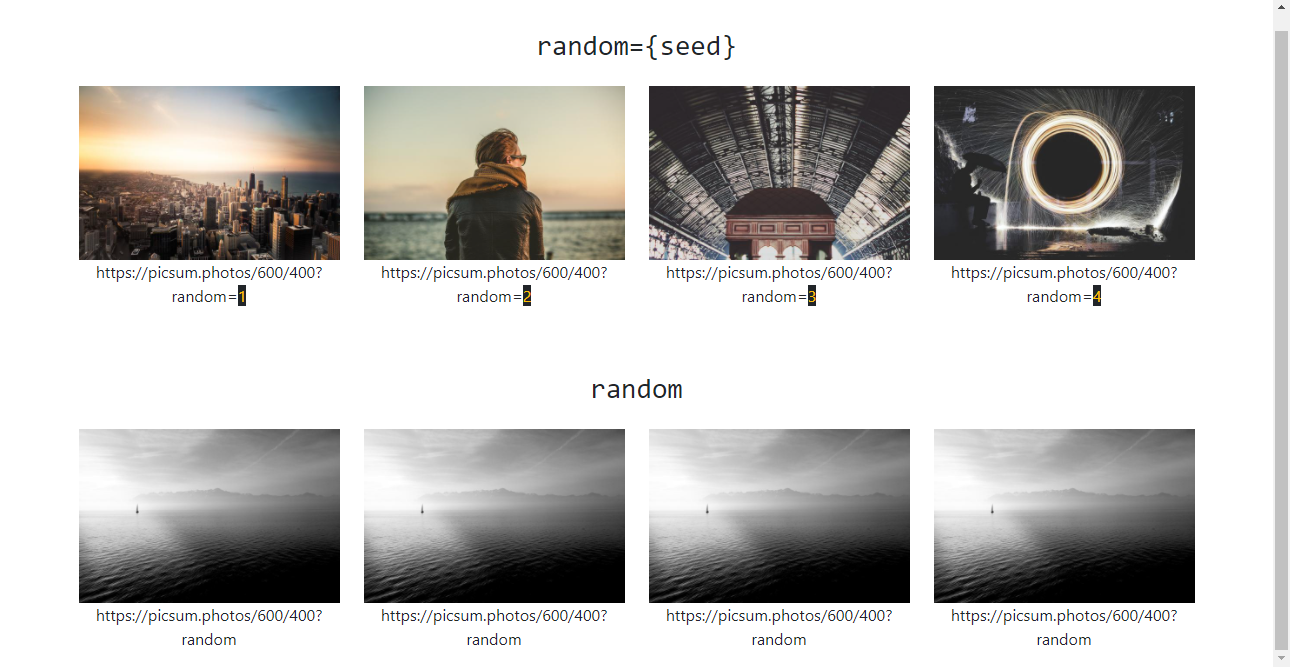
- 第一列圖片的網址由左至右分別是
https://picsum.photos/600/400?random=1、https://picsum.photos/600/400?random=2、https://picsum.photos/600/400?random=3、https://picsum.photos/600/400?random=4,第二列圖片的網址統一使用https://picsum.photos/600/400?random - 第二列的圖片在每次重新整理網頁時都會更新,但會是四張一樣的圖
- 需要隨機圖片的話,把圖片網址改為
picsum-grayscale:灰階假圖picsum-blur:有模糊效果的假圖picsum-square:正方形假圖picsum-grayscale-blur:灰階加模糊效果- 其餘預設效果可參考套件的說明內容
Live Server
套件網址:https://marketplace.visualstudio.com/items?itemName=ritwickdey.LiveServer
安裝完畢後,VSCode 右下角會出現 Go Live 按鈕,點下啟動 Live Server。
預設可以在localhost:5500即時看到 VSCode 的檔案(修改檔案內容後,存檔、重新整理localhost:5500上的頁面,才會看到修改內容)。
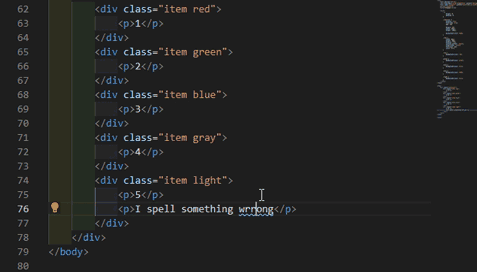
Code Spell Checker
套件網址:https://marketplace.visualstudio.com/items?itemName=streetsidesoftware.code-spell-checker
支援 CamelCase,並且偵測到拼寫不正確的單字時,會提供建議用字,如下圖:
自訂 snippets
自訂了一個帶有 bootstrap5 CSS 與 JS CDN 連結的 html 樣板。
- 從bootstrap5 官方文件複製 html 樣板內容
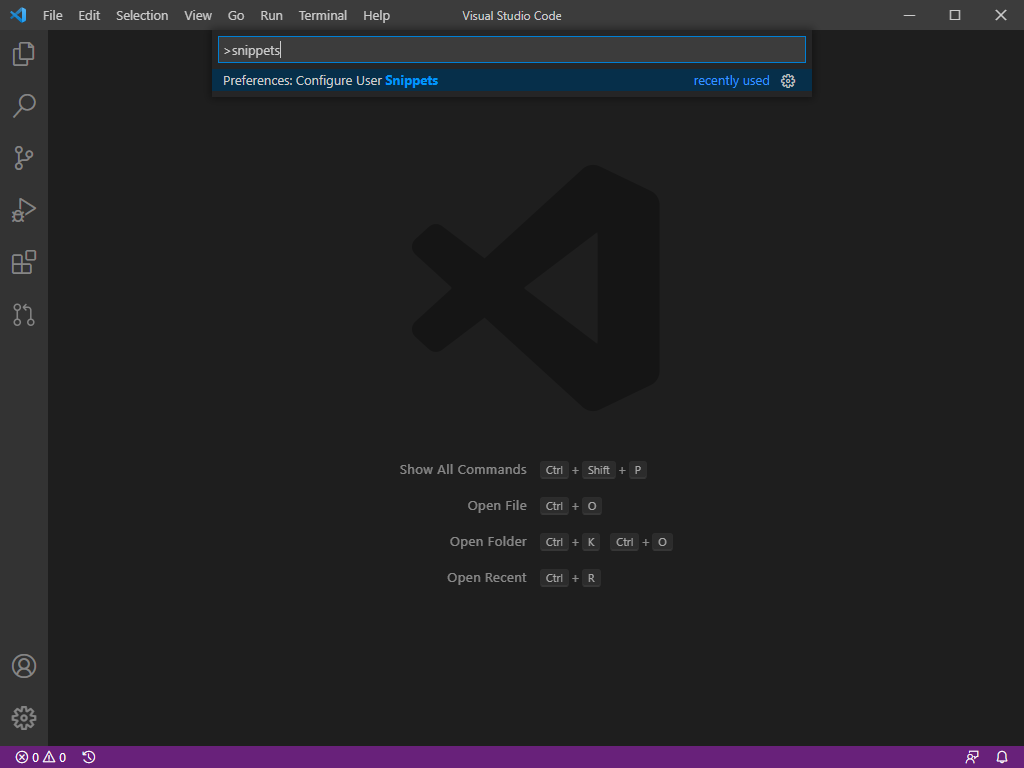
- 開啟 VSCode,按下 F1,輸入「snippets」,選擇「Preferences: Configure User Snippets」
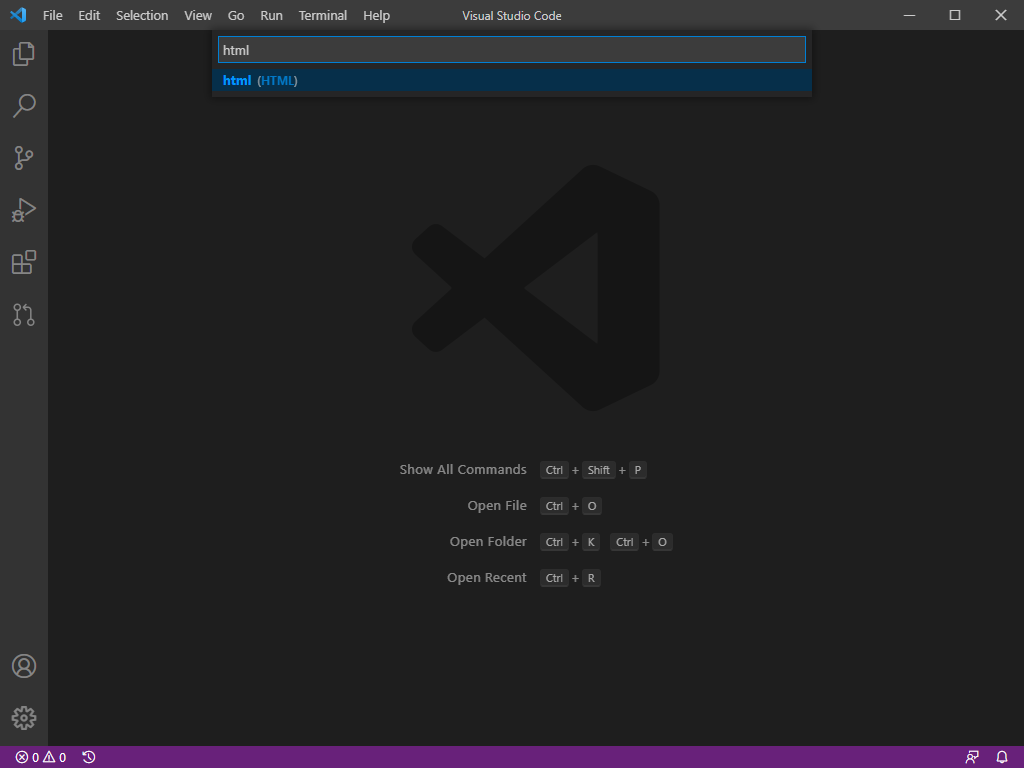
- 因為要建立的是 html 樣板,故輸入 html,意即建立給 html 文件使用的 snippets
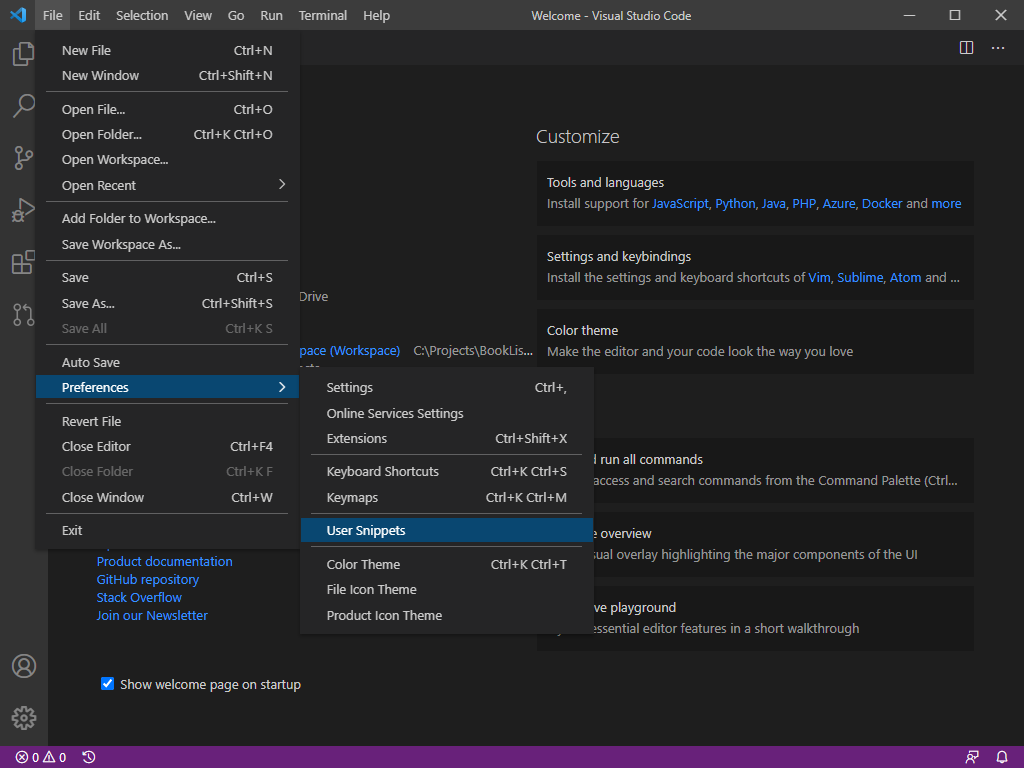
- 另外一個開啟 html.json 的方式是依序點選「畫面右上角的 File(Mac 版為 Code) >> Preferences >> User Snippets」後,輸入 html 開啟 html.json
- 在 html.json 檔案中貼上 bootstrap5 的 html 樣板內容
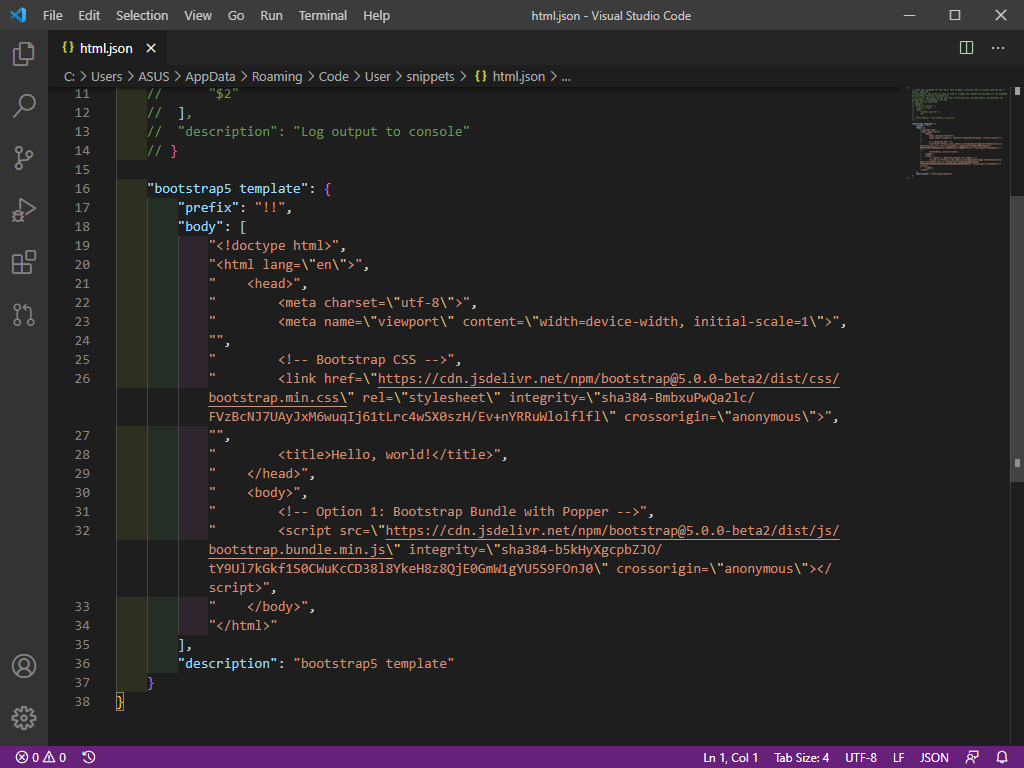
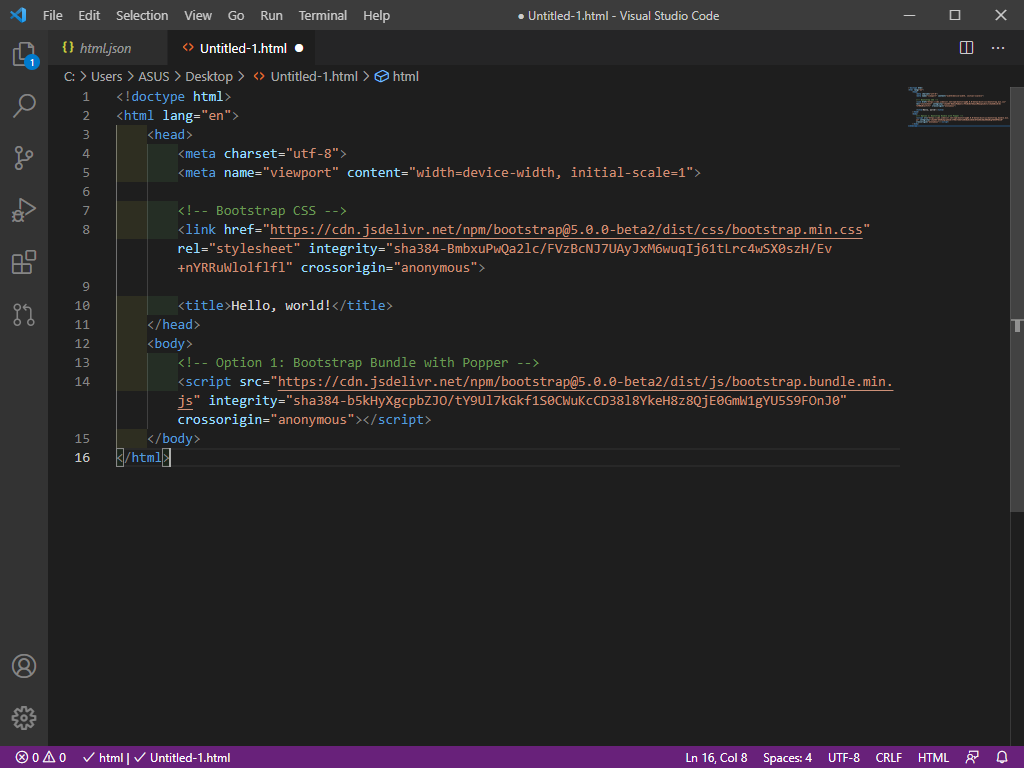
- 圖中第 16 行
bootstrap5 template代表 snippets 名稱 - 第 17 行prefix的值代表呼叫 snippets 的快速鍵,為了避免跟 VSCode 預設的 html 樣板起衝突,設定為!!- 第 18 至 35 行body的值代表 snippets 的內容,每一行後面須加上半形逗號,分隔內容 - 第 36 行description是輸入快速鍵時出現在 snippets 選單的說明內容,請參考下圖 原始碼如下:
"bootstrap5 template": {"prefix": "!!","body": ["<!doctype html>","<html lang=\"en\">"," <head>"," <meta charset=\"utf-8\">"," <meta name=\"viewport\" content=\"width=device-width, initial-scale=1\">",""," <!-- Bootstrap CSS -->"," <link href=\"https://cdn.jsdelivr.net/npm/bootstrap@5.0.0-beta2/dist/css/bootstrap.min.css\" rel=\"stylesheet\" integrity=\"sha384-BmbxuPwQa2lc/FVzBcNJ7UAyJxM6wuqIj61tLrc4wSX0szH/Ev+nYRRuWlolflfl\" crossorigin=\"anonymous\">",""," <title>Hello, world!</title>"," </head>"," <body>"," <!-- Option 1: Bootstrap Bundle with Popper -->"," <script src=\"https://cdn.jsdelivr.net/npm/bootstrap@5.0.0-beta2/dist/js/bootstrap.bundle.min.js\" integrity=\"sha384-b5kHyXgcpbZJO/tY9Ul7kGkf1S0CWuKcCD38l8YkeH8z8QjE0GmW1gYU5S9FOnJ0\" crossorigin=\"anonymous\"></script>"," </body>","</html>"],"description": "bootstrap5 template"} - 圖中第 16 行
- 以上內容輸入完畢後,存檔,之後即可在 html 格式的檔案中輸入快速鍵
!!並按下tab來套用剛才自訂的 snippets 內容