為了確保被 Google 爬取內容、納入搜尋結果的機會,通常會建議開發者提供網站 sitemap。這個檔案的目的即是提供(搜尋引擎)爬蟲一份地圖,讓爬蟲得知該網站有哪些內容。最終的目的是希望確保部落格在搜尋結果中的曝光度。
而另一方面,作為一個分享技術內容的部落格,你可能會希望對文章有興趣的讀者能夠選擇是否訂閱你的網站。而比較簡單的達成方式便是透過提供 rss 內容,讓讀者可以透過 rss 訂閱服務來主動追蹤你的更新。
而以上兩個工作項目都可以透過 astro 官方提供的外掛來處理,以下會介紹使用方式,歡迎繼續收看。
@astrojs/sitemap
在終端輸入 yarn add @astrojs/sitemap / npm i @astrojs/sitemap 進行安裝。安裝完畢後,開啟 astro.config.ts 追加以下內容:
import sitemap from "@astrojs/sitemap";
import { defineConfig } from "astro/config";

export default defineConfig({
  site: "https://<YOUR_USERNAME>.github.io/",
  integrations: [sitemap()],
  // other config...
});
注意事項:
- 必須提供
site資訊 - 於
integrations追加外掛sitemap()
接著在 ./public 資料夾新增檔案 robots.txt 並貼上以下內容。
User-agent: *
Allow: /

Sitemap: https://<YOUR_USERNAME>.github.io/sitemap-index.xml
此檔案的用意是提示搜尋引擎爬蟲「可以訪問(網站內的)哪些路由」:
Introduction to robots.txt: A
robots.txtfile tells search engine crawlers which URLs the crawler can access on your site.
現在執行 astro build 進行打包後,最終的部署用資料夾內(dist)應該要納入 robots.txt / sitemap-index.xml / sitemap-0.xml 三個檔案。其中 sitemap-index.xml 會指向 sitemap-0.xml,並後者會有網站的完整路由資訊。
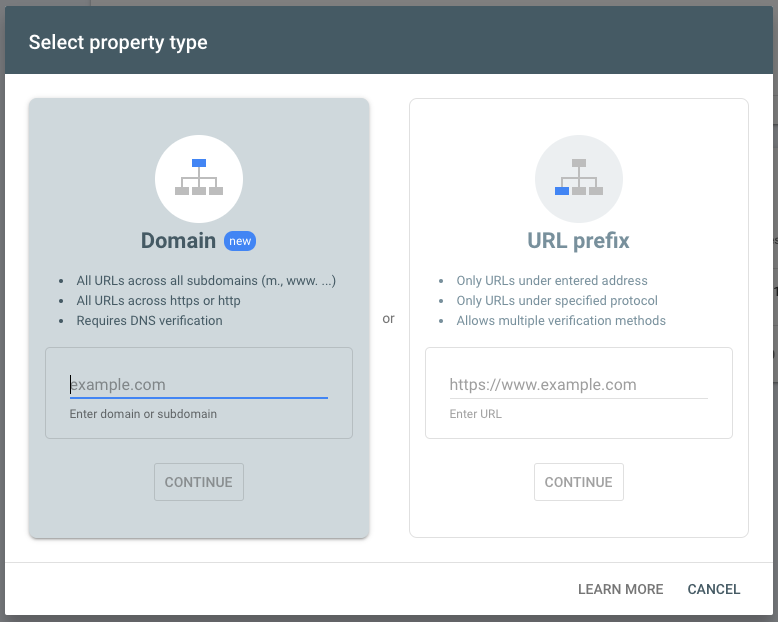
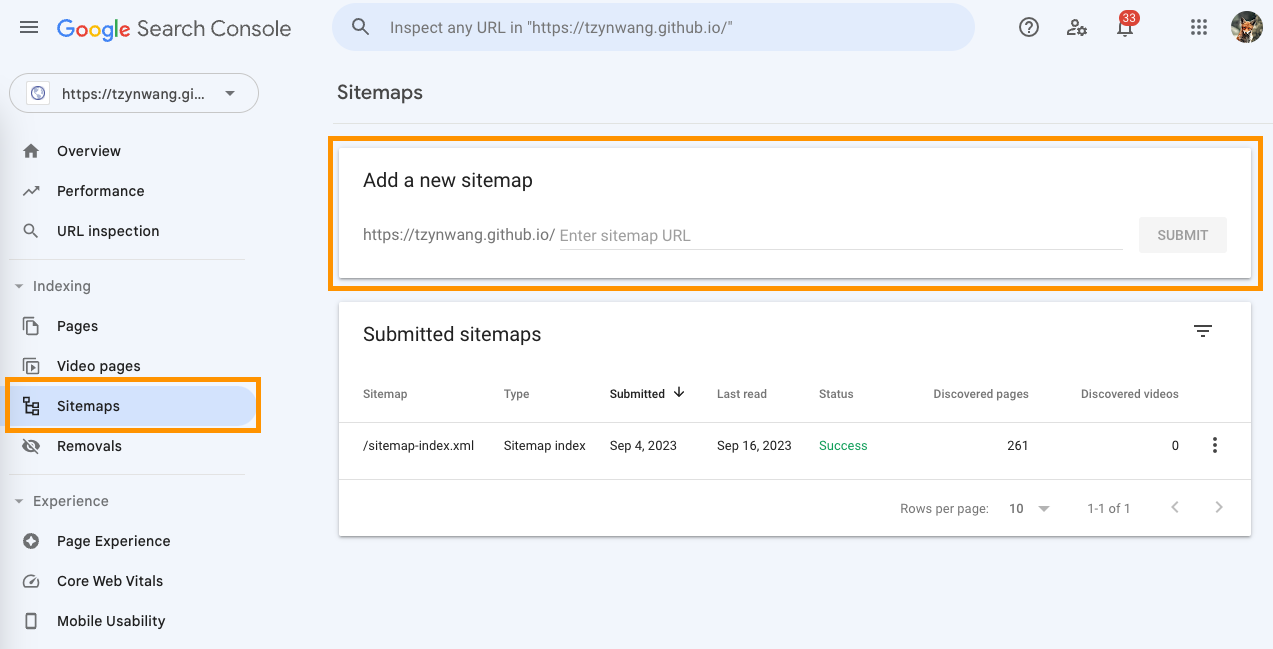
最後,進入 Google Search Console,選擇新增網站資源(如下圖):


於 url 欄位中輸入 /sitemap-index.xml 即可讓 Google 收到 sitemap 資訊。
@astrojs/rss
在終端輸入 yarn add @astrojs/rss / npm i @astrojs/rss 進行安裝,並在專案 ./src/pages 新增一個以 ${file name}.xml.ts 格式命名的檔案。檔名即是最後 rss 頁面的所在位置,比如 rss.xml.ts 會等同 /rss、而 feed.xml.ts 會等同 /feed。
我們需要在這個檔案中透過 @astrojs/rss 的 rss() 功能回傳內容:
// ./src/pages/rss.xml.ts

import rss from "@astrojs/rss";
import { DESCRIPTION, SITE, TITLE } from "@Models/GeneralModels";
import { RSS_POSTS } from "@Tools/post";

export async function get() {
  return rss({
    title: TITLE,
    description: DESCRIPTION,
    site: SITE,
    items: RSS_POSTS,
  });
}
首先提供 title / description / site 基本資訊。
// @Models/GeneralModels

export const TITLE = "普通文組 2.2";
export const DESCRIPTION = "這是一個文組轉職前端工程師的技術部落格";
export const SITE = "https://tzynwang.github.io";
items 最少需包含 title / link / pubDate 三項內容。可從 packages/astro-rss/src/schema.ts 與 packages/astro-rss/src/index.ts 得知 title 與 link 須為字串型態資料,而 pubDate 欄位允許字串、數字與 Date 物件(且最終都會被傳入 new Date() 中)。
我們可以在 @Tools/post 中新增以下功能 getPostRss 來把 ALL_SORTED_POSTS 加工為 rss items 陣列:
// @Tools/post
import { dateFormatter } from "@Tools/formatter";

function getPostRss(posts: MarkdownInstance<Post>[]) {
  return posts.map((p) => ({
    title: p.frontmatter.title,
    link: p.url || "",
    pubDate: new Date(dateFormatter(p.frontmatter.date)),
    description: p.frontmatter.summary || "",
  }));
}

export const RSS_POSTS = getPostRss(ALL_SORTED_POSTS);
(忘記 ALL_SORTED_POSTS 怎麼來可以參考第 20 天)
完成以上手續後,執行 astro start 即可在本地伺服器的 /rss 看到 rss 內容。執行 astro build 進行打包後,資料夾 dist 也會包含 rss.xml 檔案。
讀者現在能透過 rss 訂閱外掛(比如 feeder.co 的 RSS Feed Reader)來追蹤更新狀態了 (≖ᴗ≖๑)